Thinking about listing your Arlington townhome and want it to shine from the first click to the final walkthrough? You’re not alone. In the DC metro, buyers value smart layout, light, and livable spaces that work for commuting and remote work. This guide gives you a clear, room-by-room checklist tailored to Arlington townhomes so you can reduce days on market and invite stronger offers. Let’s dive in.
Why staging matters in Arlington
Arlington buyers often juggle transit access, walkability, and flexible home office needs. Townhomes here tend to have vertical layouts with narrower rooms, so scale, flow, and light make a big difference in photos and in person. Staging that highlights usable work zones and low-maintenance outdoor nooks speaks directly to local priorities. The right plan helps your home stand out in a competitive MLS environment.
Room-by-room staging checklist
General pre-work
- Declutter surfaces and store off-season items. Remove extra furniture that crowds rooms.
- Deep clean windows, grout, vents, and stair treads for crisp photos.
- Handle minor repairs, touch up paint, tighten loose hardware, and replace bulbs.
- Neutralize odors with ventilation and cleaning. Avoid heavy perfumes.
- Plan photography on a bright day right after staging is complete.
Entry and front stoop
- Powerwash steps and clear the path from sidewalk to door.
- Add a clean welcome mat and a small potted plant. Use a slim bench if space allows.
- Refresh the front door with a tasteful accent color and clean hardware.
- Remove clutter and any distracting signs, and confirm HOA rules.
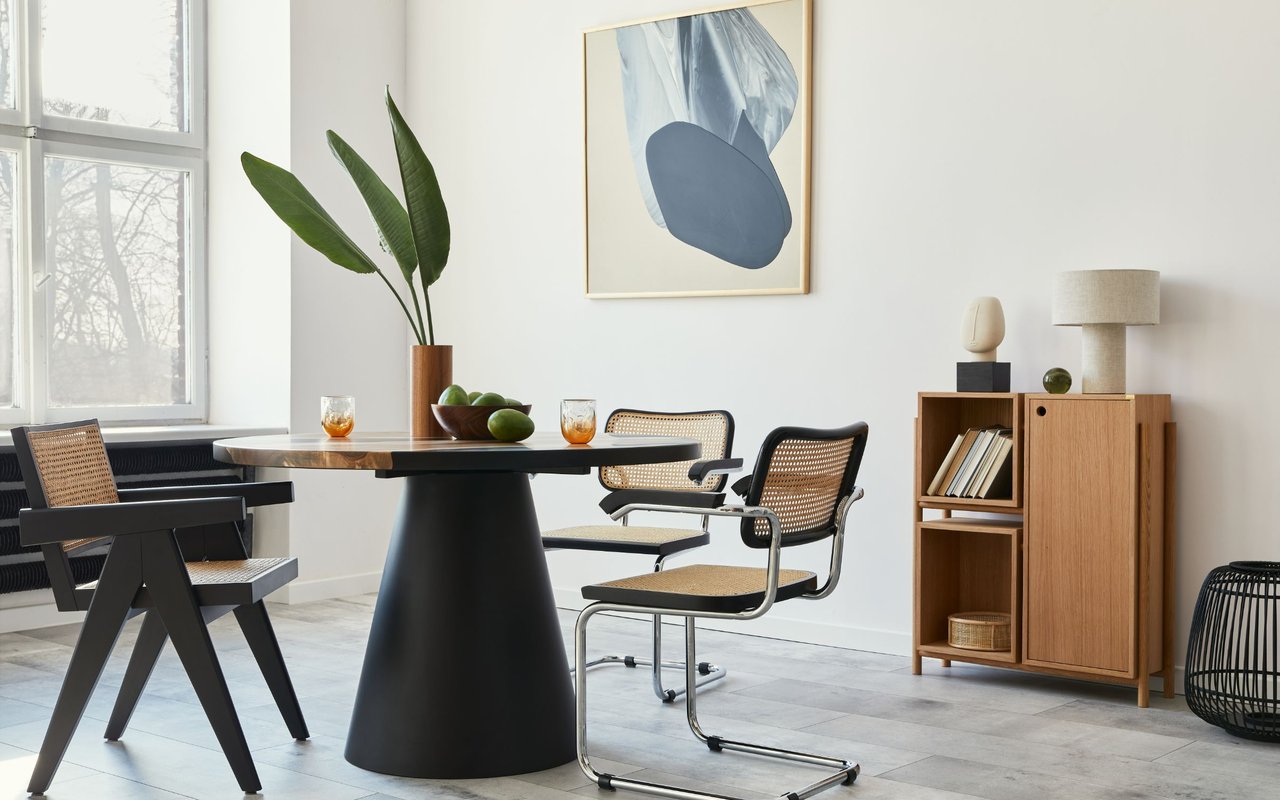
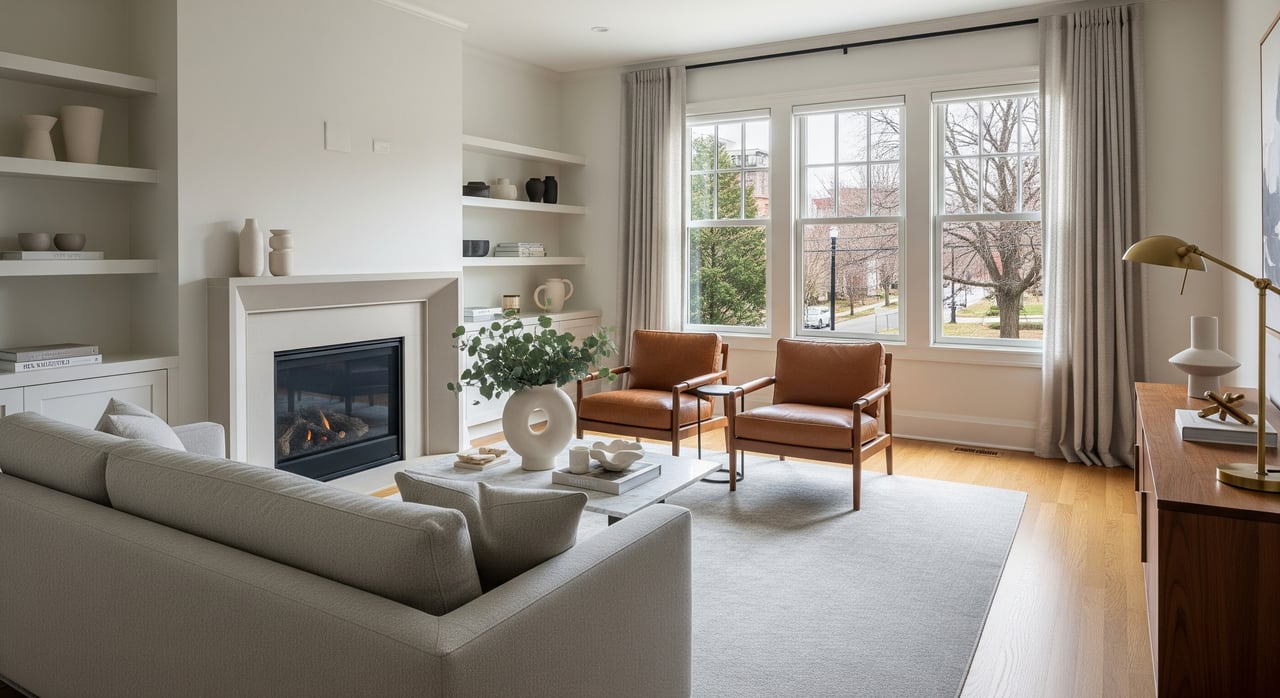
Living room and main floor
- Use scaled seating. Try a loveseat plus two accent chairs instead of an oversized sectional.
- Keep 30 to 36 inches for main walkways so traffic flows easily between stairs and seating.
- Choose a single area rug sized so front furniture legs rest on it.
- Open window treatments and add a mirror on a narrow wall to bounce light.
Kitchen
- Clear countertops to a few attractive essentials like a bowl, plant, or tray.
- Remove fridge magnets and store small appliances.
- Clean grout and hardware. A simple tray with glassware photographs well.
- If tight, remove an extra chair or island cart for photos to show circulation.
Dining area
- Use a round or small rectangular table to keep pathways open.
- Set a simple centerpiece and placemats for photos.
- If the area doubles as a workspace, stage it for dining and note its flexibility.
Bedrooms
- Keep bedding neutral with minimal layers and one art piece above the bed.
- Remove excess furniture so the room feels open.
- Clear and partially empty closets to show storage. Add matching hangers.
- In small rooms, add a compact desk only if it fits cleanly.
Bathrooms
- Deep clean glass, grout, and fixtures. Refresh caulk where needed.
- Use neutral towels and a small plant. Keep toilet lids closed.
- Remove all personal items from counters. Add a small tray for photos.
Home office or flex workspace
- Create at least one tidy work zone with a compact desk, ergonomic chair, and lamp.
- Keep cables hidden and surfaces clear of paperwork.
- If there is no dedicated office, stage a discreet corner in the living room or a bedroom.
Hallways and stairs
- Keep stairs and hallways clear to showcase the vertical layout.
- Consider a minimal gallery wall with consistent frames if it adds appeal.
- Remove small rugs that create trip hazards.
Basement or lower level
- Stage as an entertainment area, gym, or office based on light and ceiling height.
- Address musty smells or visible mechanical issues before listing.
- Add soft lighting to brighten corners for photos.
Garage and storage
- Organize and edit items to show off-street parking or storage potential.
- Sweep floors and showcase a few labeled bins or shelves.
- Store seasonal gear neatly.
Outdoor spaces
- Stage balconies, patios, or rooftops with a bistro set, compact planters, and an outdoor rug.
- Use weatherproof textiles and tidy any grill or utility items.
- String lights can suggest evening livability if allowed by HOA.
Photos vs open houses
- Photos: remove extra items to make rooms feel larger and brighter.
- Open houses: add fresh flowers and set a comfortable temperature while keeping styling neutral.
Pro tips for light, scale, and flow
- Prioritize light. Choose light paint and simple window treatments. Use mirrors opposite windows.
- Right-size furniture. Avoid bulky sectionals and large coffee tables in narrow rooms.
- Know your clearances. Keep main walkways at about 30 to 36 inches and 12 to 18 inches between sofa and coffee table.
- Hang art at eye level, about 57 to 60 inches to the center, for balanced photos.
Before-and-after examples (illustrative)
Example A: Narrow living room
- Before: Big sectional tight to the stair wall, heavy drapes, cluttered surfaces, low light.
- Staging: Swap for a smaller sofa with two narrow chairs, remove heavy drapes, add a large round mirror, and use a properly sized rug.
- After: Better traffic flow, brighter photos, and a more versatile space for entertaining or remote work.
Example B: Small balcony
- Before: Stored items and weathered furniture.
- Staging: Clear storage, add a bistro set, two planters, and an outdoor rug.
- After: Extra livable square footage on display for morning coffee or evenings outside.
Example C: Multi-use dining area
- Before: Crowded counters and mismatched seating with no clear zone.
- Staging: Clear counters, bring in a small round table with coordinated chairs, and set minimal place settings.
- After: A defined dining space that still feels flexible.
Costs, ROI, and timing
Industry studies and agent feedback often show staging can help homes sell faster and increase buyer interest, though results vary by property and quality of staging. For Arlington neighborhoods like Clarendon, Rosslyn, or Crystal City, ask your agent for local comps that show how presentation affects time to contract and offer strength.
Common service types include a paid consultation, partial staging for main rooms, full-home staging with rental furniture, and virtual staging for photos. Pricing varies by scope and rental duration, so request local quotes. Allow 2 to 7 days for staging based on inventory and schedule professional photography within 24 to 48 hours after staging is complete.
Vendor coordination checklist
- Scope of work: rooms staged, items provided, and any minor repairs or paint.
- Rental term and removal date: set firm install and pickup windows, plus fees for extensions.
- Delivery and installation: timing, access, and any elevator reservations.
- Damage and insurance: who covers damage to property or staged items.
- Maintenance: plan for plant care and quick resets between showings.
- Photography timing: confirm staging completion before photo day.
- Storage: clarify where your personal items will be kept.
- Access and keys: lockbox procedures and HOA requirements for vendors.
Legal and building policies to confirm
- HOA or condo rules: elevator reservations, move hours, use of common areas, and loading access.
- Disclosure and transparency: do not conceal material defects. If you use virtual or digitally edited photos, follow MLS and association rules about disclosures.
- Safety and accessibility: keep walkways open for inspectors and showings.
Staging-day timeline
- One week out: declutter, deep clean, and complete minor repairs. Confirm HOA requirements.
- Two to three days out: staging installation. Keep rooms clear and labeled for the team.
- Photo day: schedule within 24 to 48 hours after staging. Shoot on a bright day if possible.
- Listing live: maintain staging and refresh light touches before each showing.
- Open house week: tidy surfaces, set comfortable temperature, and water plants if applicable.
Ready to list with confidence
A thoughtful plan tailored to Arlington’s townhome layouts helps buyers see how your space lives day to day. When you combine clean lines, right-size furnishings, and flexible work zones with strong photography, you position your home to compete in the DC metro. If you want a seamless, design-forward process and vetted vendors, connect with concierge guidance from Vie Nguyen. Schedule your concierge consultation.
FAQs
What should Arlington townhome sellers prioritize first?
- Start with decluttering, deep cleaning, and minor repairs, then focus on light, scaled furniture, and clear walkways that fit narrow layouts.
How do I stage a very small balcony in Arlington?
- Remove storage, add a compact bistro set with two chairs, a small rug, and a planter to showcase usable outdoor living.
How can I create a workspace in a narrow townhome?
- Carve out a discreet corner with a compact desk, good task lighting, and tidy cable management, or convert a guest room into a simple office.
How long does staging usually take for townhomes in Arlington?
- Plan for 2 to 7 days depending on scope and inventory, and schedule professional photos within 24 to 48 hours after staging.
Is virtual staging allowed for Arlington listings?
- Virtual staging is an option for photos, but follow MLS and local association rules, and disclose digital alterations when required.